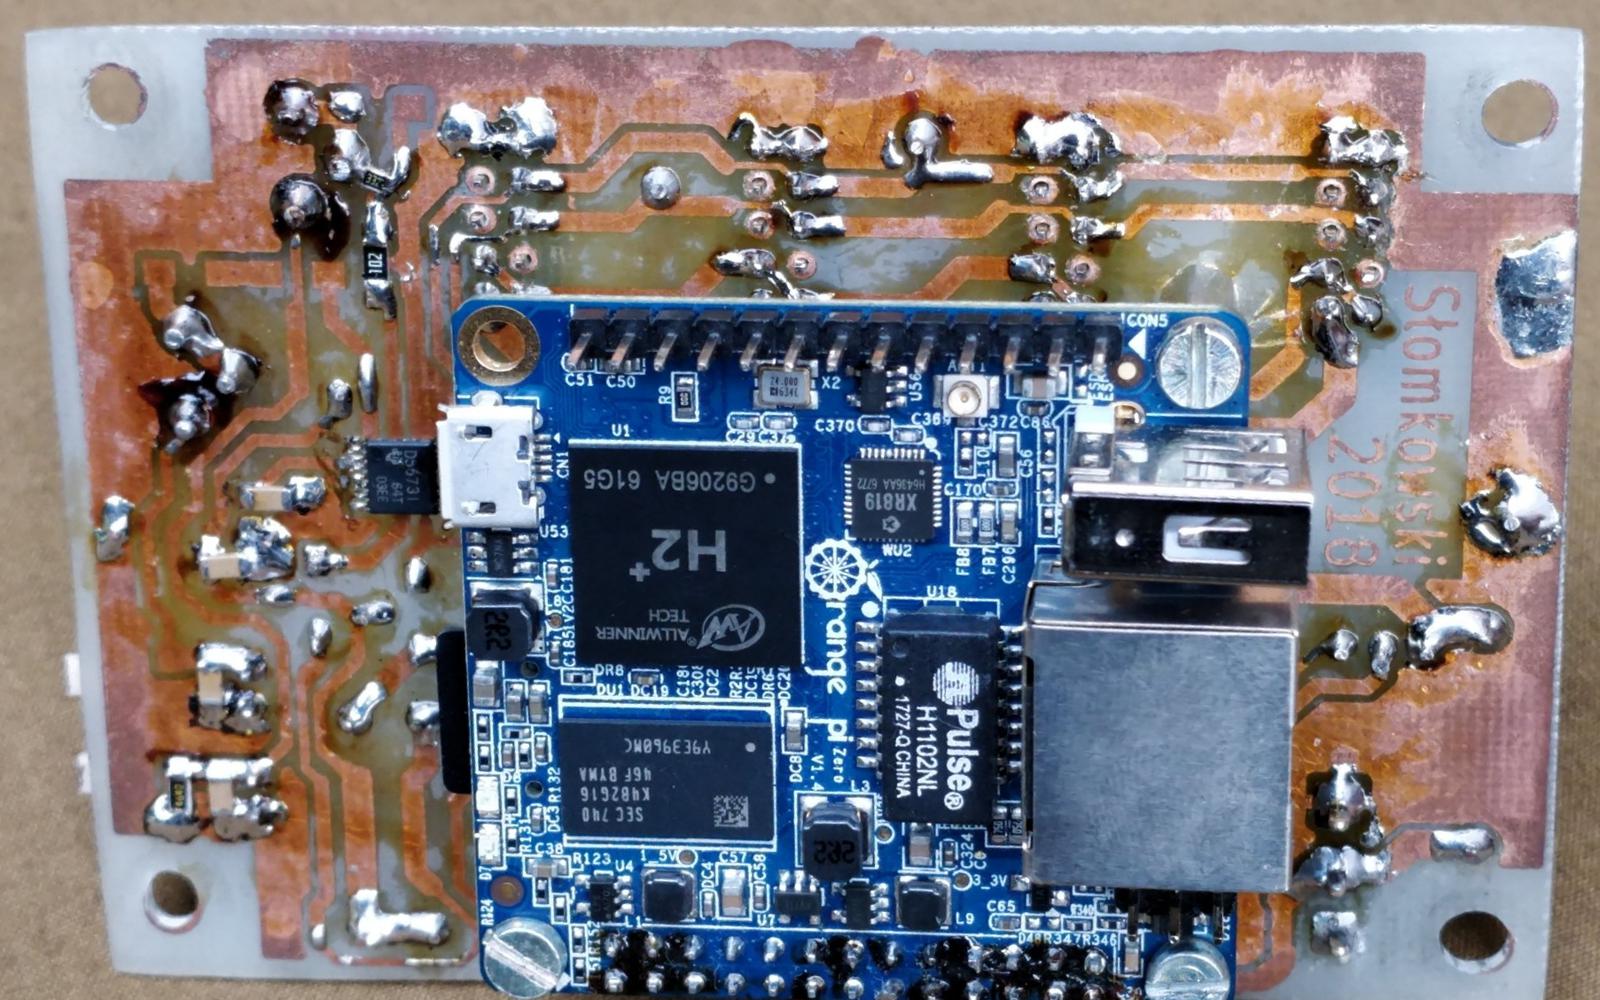
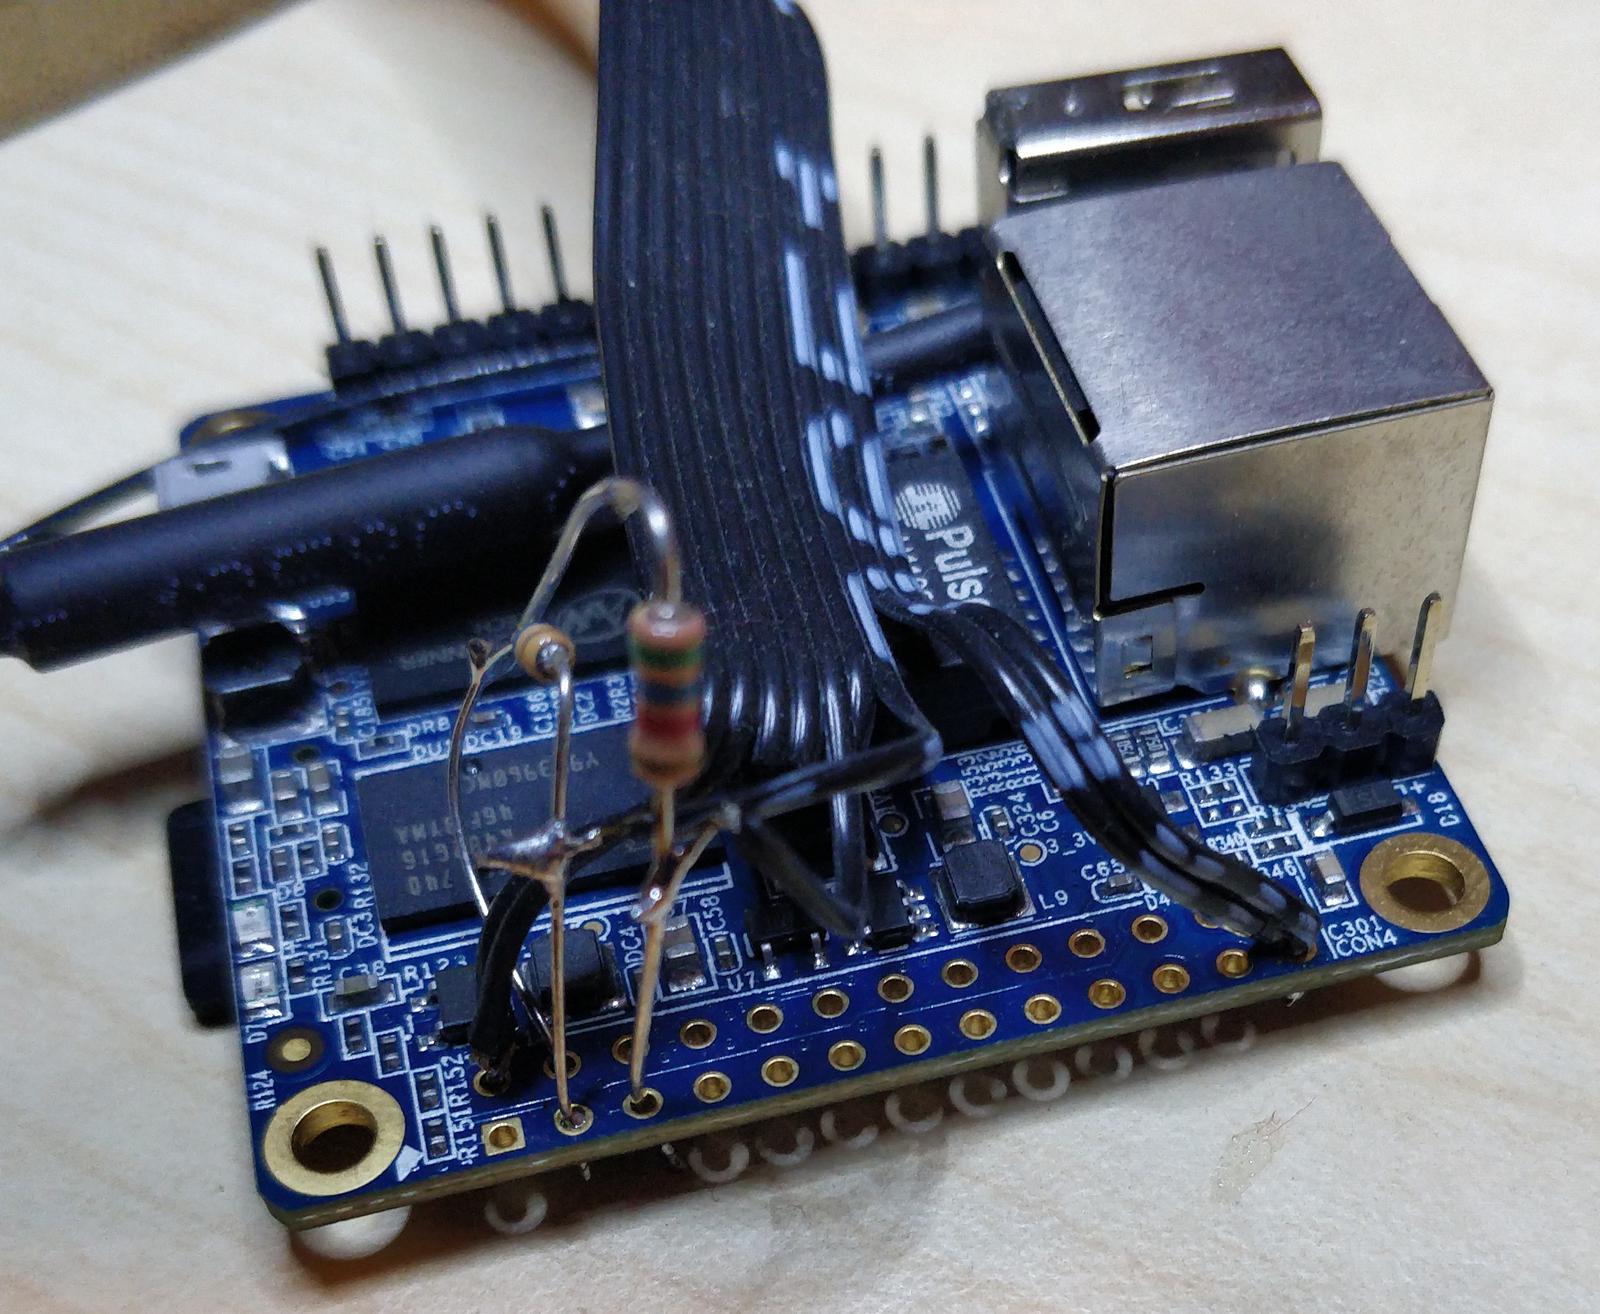
The last board in the collection, the brain. Its main component is Orange Pi Zero, a cheap Chinese alternative to Raspberry Pi Zero. Its main advantage is onboard Wi-Fi and Ethernet. The motivation for the very existence of this PCB is to hide the too modern layout of the single board computer from view and provide additional peripherals. Since the schematic is so simple, there’s not much to explain.
As seen in the photos, the board holds the Orange Pi by three screws and 2x13 header. It provides the required 5 V from system bus. Speaking of which, there are four 10-pin system bus connectors, just to make the whole thing future-proof. The MOSFET level shifter shifts 5 V to 3.3 V for I²C.
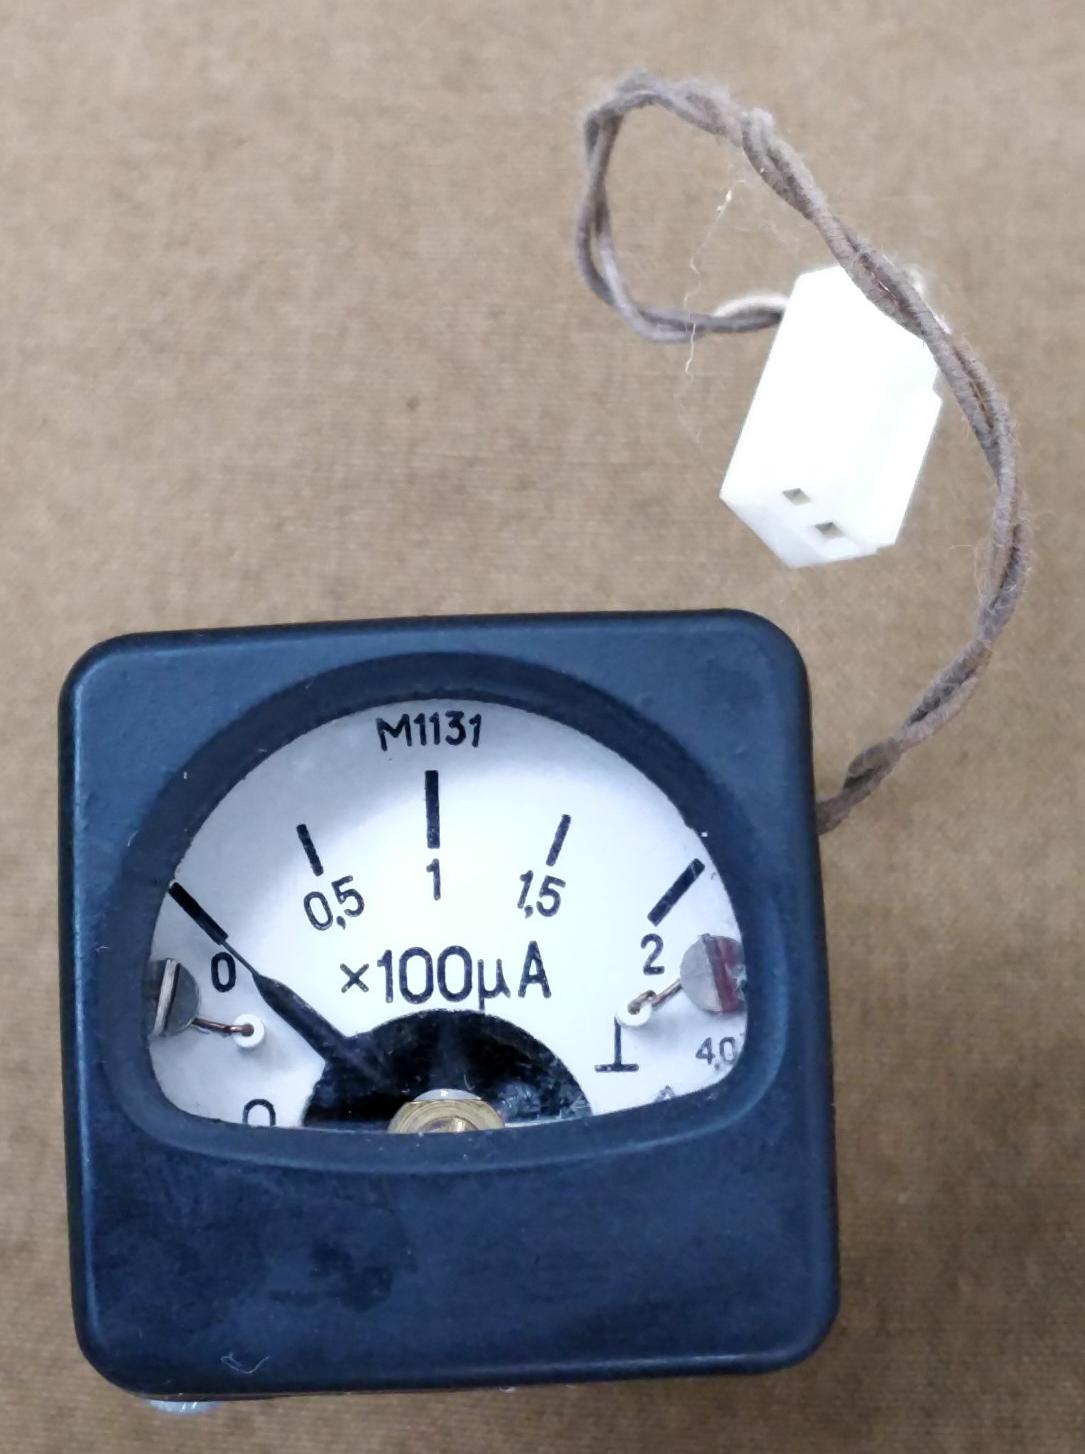
There is also I²C DAC5573 devised for controlling the external analog gauge meters. It is four-channel, but only two of the outputs are routed to external connectors. There are potentiometers RV1 and RV2 for fine-adjusting the gauge meters. Currently one channel is actually used, it displays the CPU usage. Quite a nice touch.
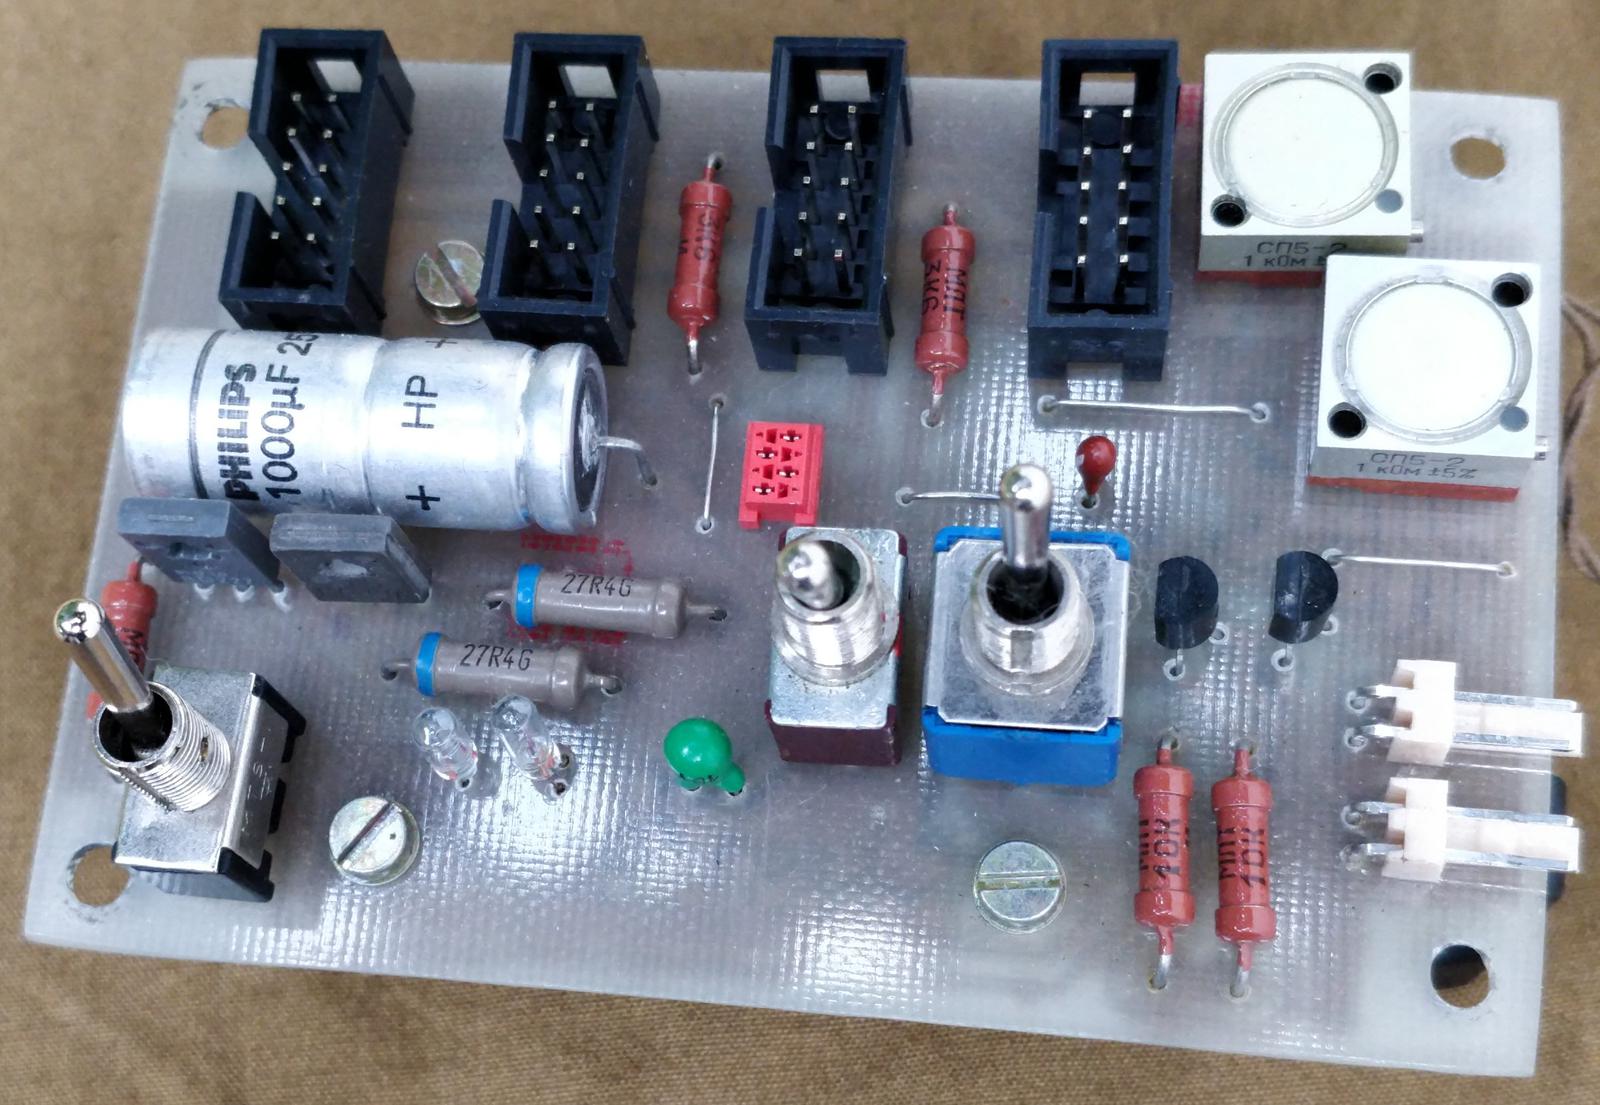
Switch SW3 is used to disconnect the system bus from Orange Pi and connect to external socket instead. It was put to simplify the development process. There is also SW2 switch which acts as programmatic shut down button. There is script which listens on appropriate GPIO pin to trigger system shutdown.
I put two system indicators too. Since I didn’t manage to find nice-looking LEDs, I stayed with miniature light bulbs. They are switched on by default, they go off only when respective GPIO is set as output and then set to 0. This way, when the boot sequence is complete and octoglowd daemon is running, they are all off.

Software stack
The Pi has 16 GB MicroSD with Armbian installed. It is connected to the home network by Wi-Fi. The central application which controls the whole device is octoglowd, described in detail in the following section. Octoglow daemon is a Java application. To have it run at startup, I use supervisord. It is convenient, because it also tries to restart the app after unexpected crashes. I also created Python script (software/running-proc-gpio-eventlistenter.py) to drive the light bulb associated with running daemon. Supervisor monitors the daemon, when it crashes, the light goes up automatically.
The other script software/reset-button-handler.sh constantly monitors the state of the button GPIO. If it detects state 0, it calls shutdown -h now. This is done to safely shut down the Linux system without the need to log into it via SSH.
Armbian installation
As of 2023, Armbian version 23.8 bookworm is installed. Using armbian-config tool, we need to enable GPIO and I²C. Following packages were installed, some are required, some are for convenience:
apt install powertop openjdk-17-jre-headless supervisor most multitail pydf mtr htop vim iputils-ping btop wavemon git
I also added my default shell scripts. I created separate user for octoglowd daemon:
adduser octoglow
gpasswd -a octoglow i2c
Adjusting I²C frequency
By default, the I²C frequency is 100 kHz, however I encountered read errors and bus hangups, probably because of the interference generated by Geiger and magic eye step-up converters. To fix it, I decreased the I²C frequency to 40 kHz, which solved the problem.
To change the I²C frequency of Orange Pi Zero in Armbian, you have to recompile DTB file. They are located in /boot/dtb. For Orange Pi Zero, the file is sun8i-h2-plus-orangepi-zero.dtb. Decompile it:
dtc -I dtb -O dts sun8i-h2-plus-orangepi-zero.dtb -o sun8i-h2-plus-orangepi-zero.dts
Look for the I²C 0 entry: i2c@01c2ac00 in dts file, it should look similar to this:
i2c@1c2ac00 {
    compatible = "allwinner,sun6i-a31-i2c";
    reg = <0x1c2ac00 0x400>;
    interrupts = <0x0 0x6 0x4>;
    clocks = <0x3 0x3b>;
    resets = <0x3 0x2e>;
    pinctrl-names = "default";
    pinctrl-0 = <0x1d>;
    status = "disabled";
    #address-cells = <0x1>;
    #size-cells = <0x0>;
    phandle = <0x5c>;
};
Add entry setting I²C frequency to 40 kHz in hexadecimal format:
clock-frequency = <0x9c40>;
Compile the dts file and reboot the Orange Pi Zero:
dtc -I dts -O dtb sun8i-h2-plus-orangepi-zero.dts -o sun8i-h2-plus-orangepi-zero.dtb
Octoglow daemon
octoglowd (software/octoglowd) is a JVM application written in Kotlin. I made heavy use of coroutines, the Kotlin approach to concurrent programming. It provided me the great opportunity to learn them. I used some notable libraries:
- dvlopt I2C library for accessing I²C devices
- exposed as ORM backed with sqlite3
- stateful4k - state machine framework (not available in Maven central repository, you have to install it yourself)
- konf for managing the configuration. At startup, it is loaded from config.yml
It should be noted that this app is an second attempt to write Octoglow daemon. The previous one was done in Rust, but I suffered from steep learning curve and immature language. Lacking good async libraries also didn’t help. This abandoned code is archived in branch octoglowd-rust in the repository.
The architecture is all about standalone workers called daemons, which take care of all aspects of the functionality. Each daemon defines its pooling interval. Some more important daemons:
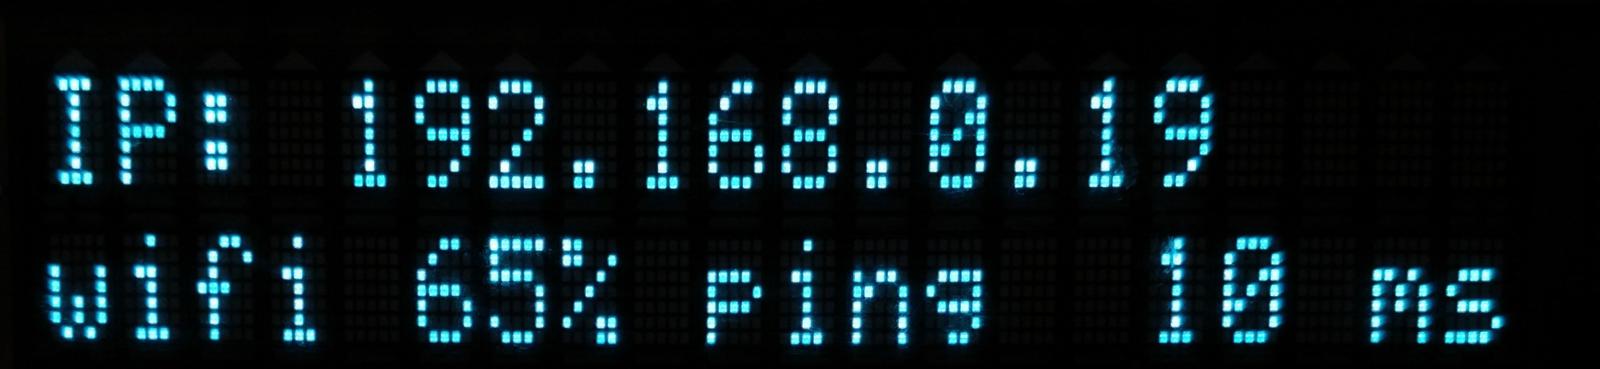
RealTimeClockDaemon- called each second, sets the current time on the clock displayCpuUsageIndicatorDaemon- periodically checks the CPU usage and sets the gauge needleFrontDisplayDaemon- most important daemon, pools the front display’s dial and draws the content of the front display.
There is naturally code for communicating with each I²C device. I made an abstraction class I2CDevice, which wraps dvlopt library in coroutines nicely.
Front display daemon
FrontDisplayDaemon is the most complicated daemon because it accepts input from the dial and manages the pooling data from various devices and redraws the display. It is based on the concept of views. Each view is concerned with collecting data from single sensor or service and displaying it on the screen. The user cycles between the views by turning the knob. If there’s no input from the user for a prolonged time, the views are cycled automatically, by predefined interval. Each view can also define its own menu. You enter it by pressing the knob. For example, GeigerView has menu to enable or disable the magic eye.
Let’s describe the functionality taking CryptocurrencyView as example. Its task is to download exchange rates of three defined coins from coinpaprika.com and display them on the screen. Function poolStatusData() interacts with coinpaprika API and saves the result to the database. Function redrawDisplay() draws the data on the screen. Each exchange rate has its differential chart drawn to easily spot the trend. The differential chart functionality is used in many views. The resolution of the VFD display is limiting the amount of information which can be shown at once, but it does the trick nonetheless.
Some of the views which are implemented are shown below: